Quick Navigation
The mitered corner is a technique used in quilting when two edges meet and create a 90° corner at their meeting point. This method allows quilters to miter the corners of binds and borders and, if properly done, makes the corners of the quilt beautiful and perfectly squared.
Not only that, but it also allows corners to lay flat with no bulk fabric underneath the edges.

With all these benefits, no doubt, every quilter should know how to milter corners if they truly want a project that will earn the admiration of quilt lovers, but it is quite unfortunate that not all quilters have the technical know-how.
Fortunately, this article is drafted to help quilters learn how to sew mitered corners with ease because every step herein is carefully explained.
What is a mitered corner?
Mitered corners are corners created when two edges of fabric meet at 45° forming a 90° angle.
What is the purpose of mitered corners?
The main purpose of mitered corners is to give your quilt project nice and perfect squared shape corners. And also to prevent bulk fabrics under edges and to enable the corner lay flat.
How do you sew mitered corners?
Materials needed
- Fabric
- Marker
- Sewing gauge
- Scissors
- Sewing machine
- Pins
- Iron
The steps to sew mitered corners
- Fold about half or a quarter inch of the fabric and iron it. Fold it one more time (an inch) and iron it again. Do the same for other corners as well.
- Open the fabric such that only the first crease will be folded over. Measure twice the width of the border, starting from the corner down to each side. Sketch a line that will link the two marks and fold the corner halfway diagonally, facing the wrong side out. Make sure the two marks are straight, and then iron it to form a diagonal crease and try to hold it in place with a pin. Do the same for every corner.
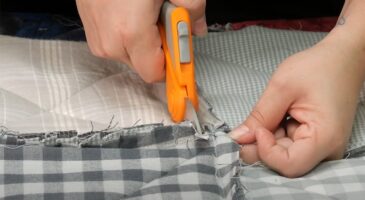
- Backstitch from the vertical crease down to the edges. It is ideal to begin from the top edge: the meeting point of the fabric’s two sides. Trim excess fabrics from the seam (about 1/4 inch).
- Iron the small seam to open it up. Turn it with the right side facing out, then push out the point of the corner. If your project requires backing, slip it underneath the mitered corner.
- Hold the open edges in place with a pin. Topstitch over the inside edge and press with an iron. To give your fabric a look crisper, you can starch it later.
How to sew mitered corners on a quilt border
Materials needed
- WIP quilt top
- Ruler
- Pencil
- Border fabric
- Pins
- Scissors or rotary cutter
- Thread.
Step 1 – Determine the length
To help determine the length of each border, make use of this formula: length of quilt side + (border width × 2) + 6 inches. This will give you the total border fabric.
Terminologies explained
- Length of quilt side: measure the quilt’s side length, which the border will be sewn.
- The border width: Measure the width of the quilt, and then multiply it by two.
- Plus 6 inches: This is the extra fabric that will be required for your mitered corner on all sides of the border, including the seam allowance.
The above formula determines the length of the border required for all sides of your quilt. After getting the appropriate length, cut the fabric according to specification. Take, for instance, the top of the quilt is 30″ by 40″, and the borders are 3″ wide. Then the equation will be; 30″ + 6″ + 6″ = 42″
If this is the case, then the two borders will measure 3″ × 42″ each.
To get the side border, the equation will be; 42 + 6 + 6 = 54. This means the aide border will be 3″ × 54″.
Step 2 – Hold the border in place
Fold the top of the quilt and the border halfway and each center. Align the centers and hold them together with a pin. Pin the ends of the border and the quilt top together, and secure the two pieces all through with another pin.
Step 3 – Sew the quilt top border
Sew the border of the quilt top, beginning and ending it about 1/4″ away from the end of the quilt, and backstitching each of the ends. The same should be repeated for all other borders.
Step 4 – Mark
Fold the top of the quilt halfway diagonally, putting the right sides together to form a triangle. Align two other close borders — the right side border and the top border. While they remain aligned, put your ruler across the 45° angle and drag it out over the border, then trace the angle on the border and hold it firmly with a pin.
Step 5 – Sew the mitered corner
Your sewing should begin from the stitch line before moving towards the end of the border, along the pencil line. Your stitch line here is the one you made when you joined the quilt top with the border, so begin your sewing right from there to prevent gaps on the front.
Backstitch is where you begin and end your sewing, then unfold the top of the quilt to see if there are no openings in the inside corners and also to verify if the borders are laying flat.
Step 6 – Trim and press
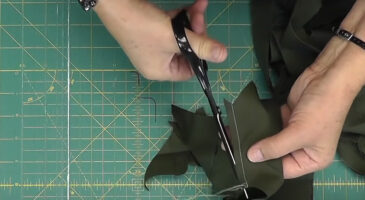
Reduce excess borders to a quarter inch and press the seam. Do the same for other corners, and you are through!
How do you sew mitered corners with bias tape?
- Unfold the bias tape and hold it to the right side of the fabric with a pin. Stitch the fold closest and the raw edge together, and stop when your stitch is about 3/8″ close to the corner. Fold the bias tape outward from the fabric to create a 45° angle.
- Hold the 45° angle and fold in the bias tape to enable the wrong side to face up.
- Stitch over the corner and move to the next one stopping when the stitch is about 3/8″ close to the corner.
- Unpin the fabric and turn it to the wrong side, then fold and press in the surplus tape at the corner to create mitered corner at the back.
- Turn it to the right side, then stitch it close to the tape edge, making sure to catch the tape on the other side so that it can be held in place.